
Made some fairly good progress this week.
I got one of the aileron shrouds fitted.
I paid a visit to my wings in storage to measure where the holes were cut in the root ribs - just to make sure I was cutting the hole for the shroud in the same location.
Just as well I checked - mine was 5mm different to Petes.
The most important thing is to get the middle of the shroud in the middle of the aileron actuator. Mine turned out to be 72mm from the spar tunnel.
Lots of stopping a checking with this job. And then just nibbling away at the edges until everything was a nice tight fit.
Once the ends are filed or Dremeled down flush, both ends are flocked in place (on the inside).
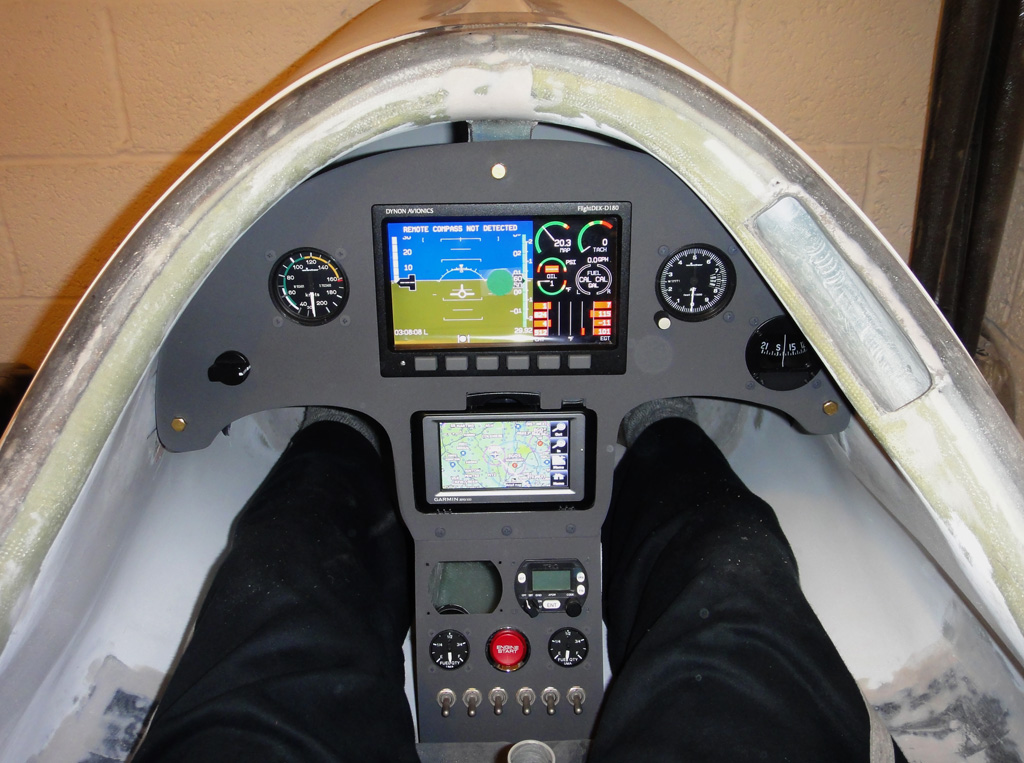
Onto the panel...
I couldn't think of a good reason not to install all the instruments.
So I went ahead and did that.
Looking pretty good now. The only thing missing is the radio - which still has not been delivered. More about that saga when it reaches it's conclusion!
I powered up the Dynon too - the only reason I could do that is because I fitted the back up battery - which is an option. Around £100 I seem to remember just for a battery!
As you can see from the back view - I put a dab of torque seal on all the instrument threads.
Next steps will be getting the shelf into the fuse box/shroud and then fitting that to the lower panel and cell.
 |
| First hole cut and centre line for inside hole marked. |
 |
| Outside end made flush |
 |
| Inside edge before trimming flush with Dremel. |
 |
| Inside all done - still got to body fill the edge gaps to make it flush |
 |
| Flocked in place. |
 |
| Pre cutting to shape - note NOT a straight line - the cell is curved. |
 |
| Panel in. |
 |
| Powered up Dynon. |
 |
| Dynon and GPS powered up - radio (and placards) still to come. |
 |
| Back - showing torque seal on threads |
No comments:
Post a Comment