Monday 23 November 2015

Week 224 - Cowling Part 3

Hours to date: 2115.75

After 20 odd hours of filling and sanding I decided it was time to try a coat of primer to see just how imperfect things were.

Still quite a bit more work to do of course but things are looking not too bad on the top and upper sides plus the lower front half.

I've used nearly a whole 4kg tin of filler (and sanded most of it off again) to get to this stage.

After 'flatting off' the primer it's easy to see the low and high points that need attention. I've also bought some guide coat paint which is black and will use that next I think as it shows where low points are even clearer than the grey primer does.

Just got to keep plugging away at the plug till it's perfect. :)

Grey stuff is body filler. White is micro underneath.

Time for a coat of primer.

I've painted the spinner too so it's easier to visualise the whole thing together.


After flatting off the primer and filling mistakes - looks like a man that's cut himself shaving.

Monday 9 November 2015

Week 222 - Cowling Part 2

Hours to date: 2096.0

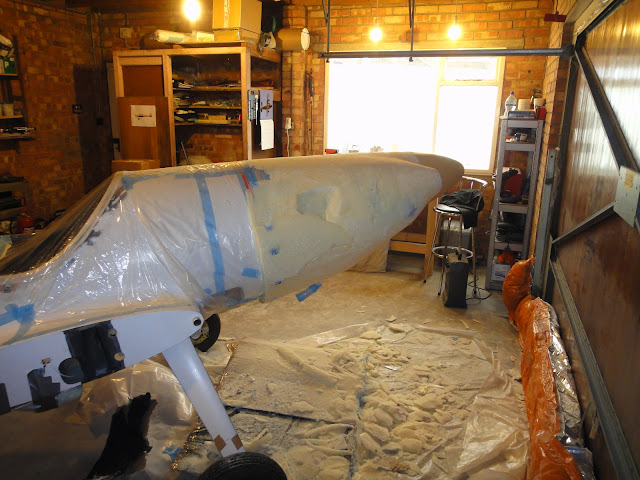
I seem to be making good progress with the cowl. 

Although the early stages give big gains in a short space of time the further into this we go the smaller the gains. The basic shape comes quite quickly then making that shape 'perfect' for the mold takes a lot longer.

That 'making it perfect' stage is where I am at now and will be for some weeks to come.

I ended up using all my 2 part foam, about 6kg in total. It expands up to 25 times in size. It kicks off quickly with an exotherm and gets hard enough to work in about 30 minutes.

To carve the foam I used a rasp, and in places where access was limited - in between the inlets and spinner for instance - I used 40 grit sandpaper.

As you can see the foam did not go perfectly so there were a few cavities that needed further foam to fill them.

After shaping for about 5 hours I switched to Micro and put a thin layer of that over the foam to seal any holes and give a smooth(ish) hard surface.

I've done two layers of micro at this stage and have now switched to body filler as it is much quicker to work with.

To start with I wasn't in love with the cowling shape - particularly at the bottom where it looked a bit 'fat'. But after covering with micro and sanding that down it seemed to grow on me. I am happy with the front though - it looks quite sleek and low drag looking.

The next few weeks will be spent getting the plug to perfection as any flaws will be transferred to the mold and subsequently the part and we don't want that.

Getting the basic shape sorted in foam - this stage goes quite quickly

Some cavities need filling with more foam.

Looking sleek at the front

First layer of micro on.

After sanding the micro. Liking the look of the shape even more now.

Cowl will be a bit asymmetric due to the staggering of the cylinders.

Bit of a 'fat bottom' but i think this will visually disappear when it is painted black.


Monday 2 November 2015

Week 221 - Cowling

Hours to date: 2078.5

The carbon brackets worked out good and are plenty strong enough.

I've put them in place and they will be good indicators for the foam carving to see where to stop.

I'll let the photos do the rest of the talking here.

Carbon brackets that will hold the cowl out at the back.

Brackets in place.

Ditto

Cardboard lined with a bin bag so the foam doesn't stick to it.

Final - double layer of protection for the engine before pouring foam.

All ready to go.

Eek - what a mess.

Frankentwister - I've created a monster!

2 hours later - we are starting to see a shape we like here.